Chart journal guide · 5 min
How to start an astrology journal
A simple chart-journaling workflow: add your chart, write one observation, choose a review date and keep a useful record.
By PlainAstro · Updated 2 November 2026
The chart and notes below are a demonstration, not a real person’s record. You can follow the same steps with your own information.
A useful astrology journal can start with one chart and a few sentences. You do not have to write every day, understand every aspect, or turn each event into an astrological explanation.
The aim is to leave a clear record that makes sense when you read it again. In PlainAstro, your chart stays beside the writing area so you can refer to it without switching between pages.
1. Add a chart you have permission to keep
Open the chart journal and choose Add chart. Give it a name, enter the birth date, select the birth place from the suggestions, and add the birth time if you know it. Choose Save chart.
If the birth time is unknown, leave it blank. The journal hides houses and angles, and its Moon position is a noon estimate that may differ from the actual birth position. Avoid inventing a time to fill the gap.
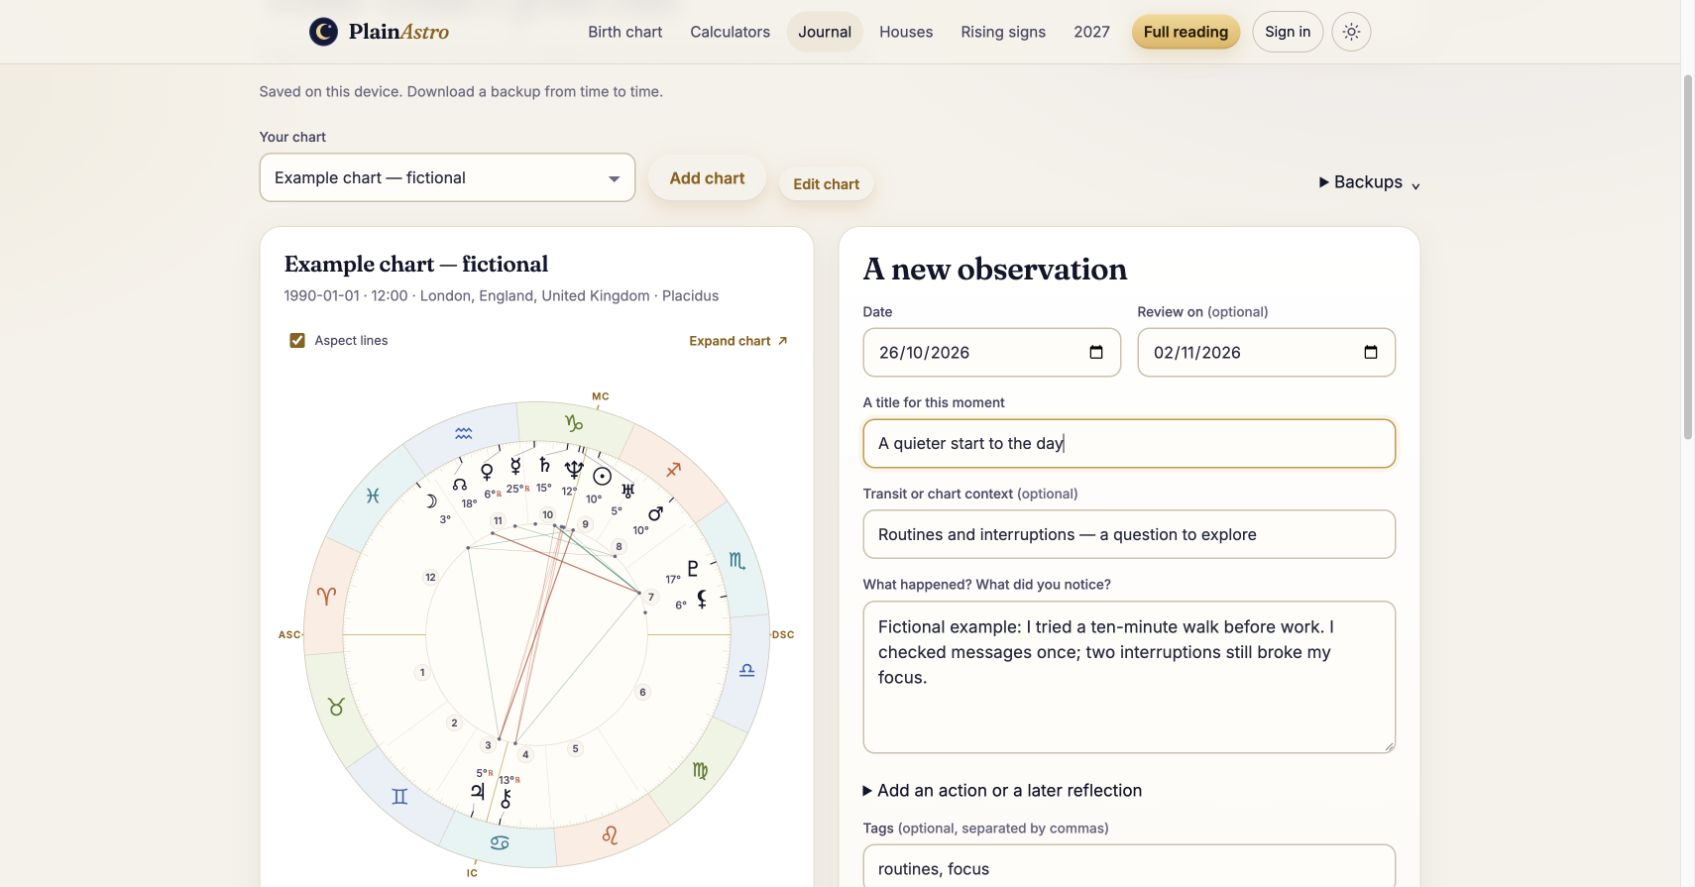
Our demo uses a chart named “Example chart — fictional”: 1 January 1990, 12:00, London. These details were chosen only to show the interface.
2. Write down one ordinary observation
Give the entry a date and a title you will recognise later. In What happened? What did you notice?, describe something concrete: what you did, what changed, and what stayed the same.
Example entry · 26 October 2026
A quieter start to the day
“I tried a ten-minute walk before work. I checked messages once; two interruptions still broke my focus.”
This is more useful to revisit than a broad label such as “a powerful day.” It leaves room for several explanations, including routine, workload and other people’s actions.
3. Add context only when it helps
The optional Transit or chart context field is a place for your own label or question. You might write “Routines and interruptions — a question to explore.”
If you are studying a specific transit, check its dates and placements separately before recording them. The journal does not automatically calculate transits for each entry or interpret your notes.
4. Choose one action and a review date
Open Add an action or a later reflection. Record a small action you can actually observe, such as trying the same morning routine on three weekdays. Set Review on to a date when looking back will be useful.
A review date makes an entry available under Show → Ready to review when that date arrives. It is a filter inside the journal, not an email or push reminder.
Add one or two tags, such as routines and focus, then choose Save entry. Entries save when you press the button; unfinished text in the editor is not a saved entry.
5. Return without rewriting the first impression
When you return, choose Edit / reflect on the saved note. Use the later-reflection field to record the outcome, including “nothing changed” when that is what happened. Keep the original observation intact when possible.
A matching date or a familiar theme does not establish that a transit caused an event. A journal can preserve what you noticed while leaving that question open.
Next, read how to review transit notes or how saving and backups work.